A few years ago I spent several months working on a project to digitise and archive hundreds of old family photos. These photos have been sitting around loose in boxes, stored in old photo albums, sat in houses with smokers and generally mistreated. My goal was to preserve these memories and make sure they do not fade away. He’s a few tips I picked up during this project.
Note that I am not a professional archivist or photo conservation expert. This is just a layperson’s experiences with his own project. Your results may vary.
Sorting
Before you start scanning you should sort through the photos and do a quick sort. I started by sorting the different sizes and styles of prints together, and trying to put them into sets.
Prints from the same camera will usually all be on the same size and type of paper, which can help identify sets of photos. Scanning sets together makes cataloguing them later much easier. Getting a rough idea of how many photos of various sizes you have makes it easier to purchase sleeves for them (more on that later).
Take a close look at the backs of the photos too. Sometimes there will be a stamp from the photo developing shop which can be used to match photos into sets. These stamps may even include a date if you are lucky.
Cleaning
I generally do this step as part of the scanning step below. If prints have been stored for a long time they may be dusty or dirty. I generally use a soft brush like a camera lens brush to remove any dust or fluff from prints. You can also use a soft dry cloth such as a microfiber cloth to remove finger prints, just make sure it’s clean and has no residues from cleaning chemicals on it.
I was lucky enough not to have any prints that were dirty or water damaged but I believe there are certain cleaning solutions that can be used for these prints. Just make sure you get the right type of solution for the print you have. Using the wrong type of chemical can irreparably damage prints.
Once you have the prints clean you want to keep them clean. I recommend scanning them as quickly as possible and putting them straight into an archival sleeve. Avoid handling the prints too much, hold them by the edges or use flat stamp tweezers or cotton cloves to move them around.
Scanning
Just as important as keeping your prints clean is making sure the bed of your scanner is clean. Used a mild cleaning solution such as a LCD cleaner with a microfiber cloth (NOT the same one you use on the photos) or a lens brush to make sure you keep the dust and fingerprints out of your scans.
I recommend only using a flatbed scanner for old photos. Some photo shops have tray-feed style scanners which will probably mangle your prints. They’re probably fine for newer 6×4 prints but there is no way I’d use them for old precious photos. Same goes for multi-function printers with tray-feed style scanners and portable roller-type scanners. Flatbed is best.
I scanned all my photos on a Canon PIXMA MG6150, which has an optical resolution of 4800 x 4800 dpi. Its not the best scanner in the world; there are faster scanners with better resolution and built in image processing, but for my purposes it did the job. If you have a multifunction printer, then the scanner in it will probably do the trick. There’s no need to buy a new $1000 scanner for this (unless you really want to).
Your scanner may have different settings to mine, but I set mine up to scan in tiff format at 600ppi. This resolution gives a good balance between quality, scan time and file size. Saving in lossless tiff format avoids problems with jpg compression artifacts which can ruin small photos.
Scan your photos one at a time. It may be tempting to lay half a dozen small prints on the bed and scan them in one hit. I tried this and it ended up being more trouble than its worth. You waste a lot of time cropping these files into individual images, it’s easy to lose track of order and numbering. It can also be difficult to get multiple photos perfectly square on the bed, due to bent prints etc. This means you must straighten them in post-processing, and every time you rotate a digital image, you lose some quality. So, you are better off doing one print at a time and lining it up in the very corner of the bed to make sure it’s square.
Grandmas love writing on the backs of photographs (and sometimes the fronts!), so make sure you scan the backs of these photos as well. This will help with identifying dates, individuals, locations and events later. Some photo shops also used stamps on each print they processed, which can also be a clue as to date and location.
Storage
Once your photos are scanned you need to protect them. I used products from an Australian company called Albox who produces archival folders and polypropylene sleeves. You should be able to find these kinds of materials locally.
Remember when we got a rough count of what sizes of photos we have? Well now you can order your sleeves accordingly. Very small prints can be placed in collector card sleeves. Medium sized prints need to be placed in appropriate sized sleeves. Very large photos can by mounted on A4 card and placed in an A4 sleeve.
Often you will find that you cannot find sleeves that perfectly match the size of your prints. In these cases I used black, acid-free board, cut to the size of the sleeve, and used acid-free mounting corners to fix the photos to the card. Card goes into the sleeve, and your photo looks awesome.
A word on sleeve materials. There are four main materials that plastic sleeves can be made of, polyester (PET), polypropylene (PP), polyethylene (PE) and polyvinyl chloride
- PET – Also known as Mylar or Melinex, it is the most stable and inert plastic and should last hundreds of years. Very clear and the most expensive option
- PP – Cheaper than PET, not as clear but still very inert. May not last as long as PET
- PE – Cheaper again, thinner but still inert and long lasting. Ziploc bags are usually made of PE
- PVC – AVOID – Stiffer, heavier, smelly and greasy feeling. These products are not archive safe and may damage your prints.
Make sure any backing paper or card you use is acid-free. Most scrapbook suppliers have acid-free paper and card. I started off buying mine from the archival materials supplier but then found the same stock at Officeworks much cheaper.
Self-adhesive dots, stickers, removeable tapes etc. are not recommended for holding prints onto backing cards. Even if they are labeled archival or acid-free, these adhesives may still leech onto your prints over time. Indirect mounting techniques are preferred, such as photo corners. With corners the adhesive touches the card only, and the print is held in place without ever touching adhesive.
Cataloguing and Restoring
Once you have your prints scanned and stored, it’s time to catalogue them and touch up and faded or damaged prints. I’m going to leave this for another post (or two) for the time being.


With black acid-free backing card and acid-free photo corners (top left corner is slightly mis-placed)

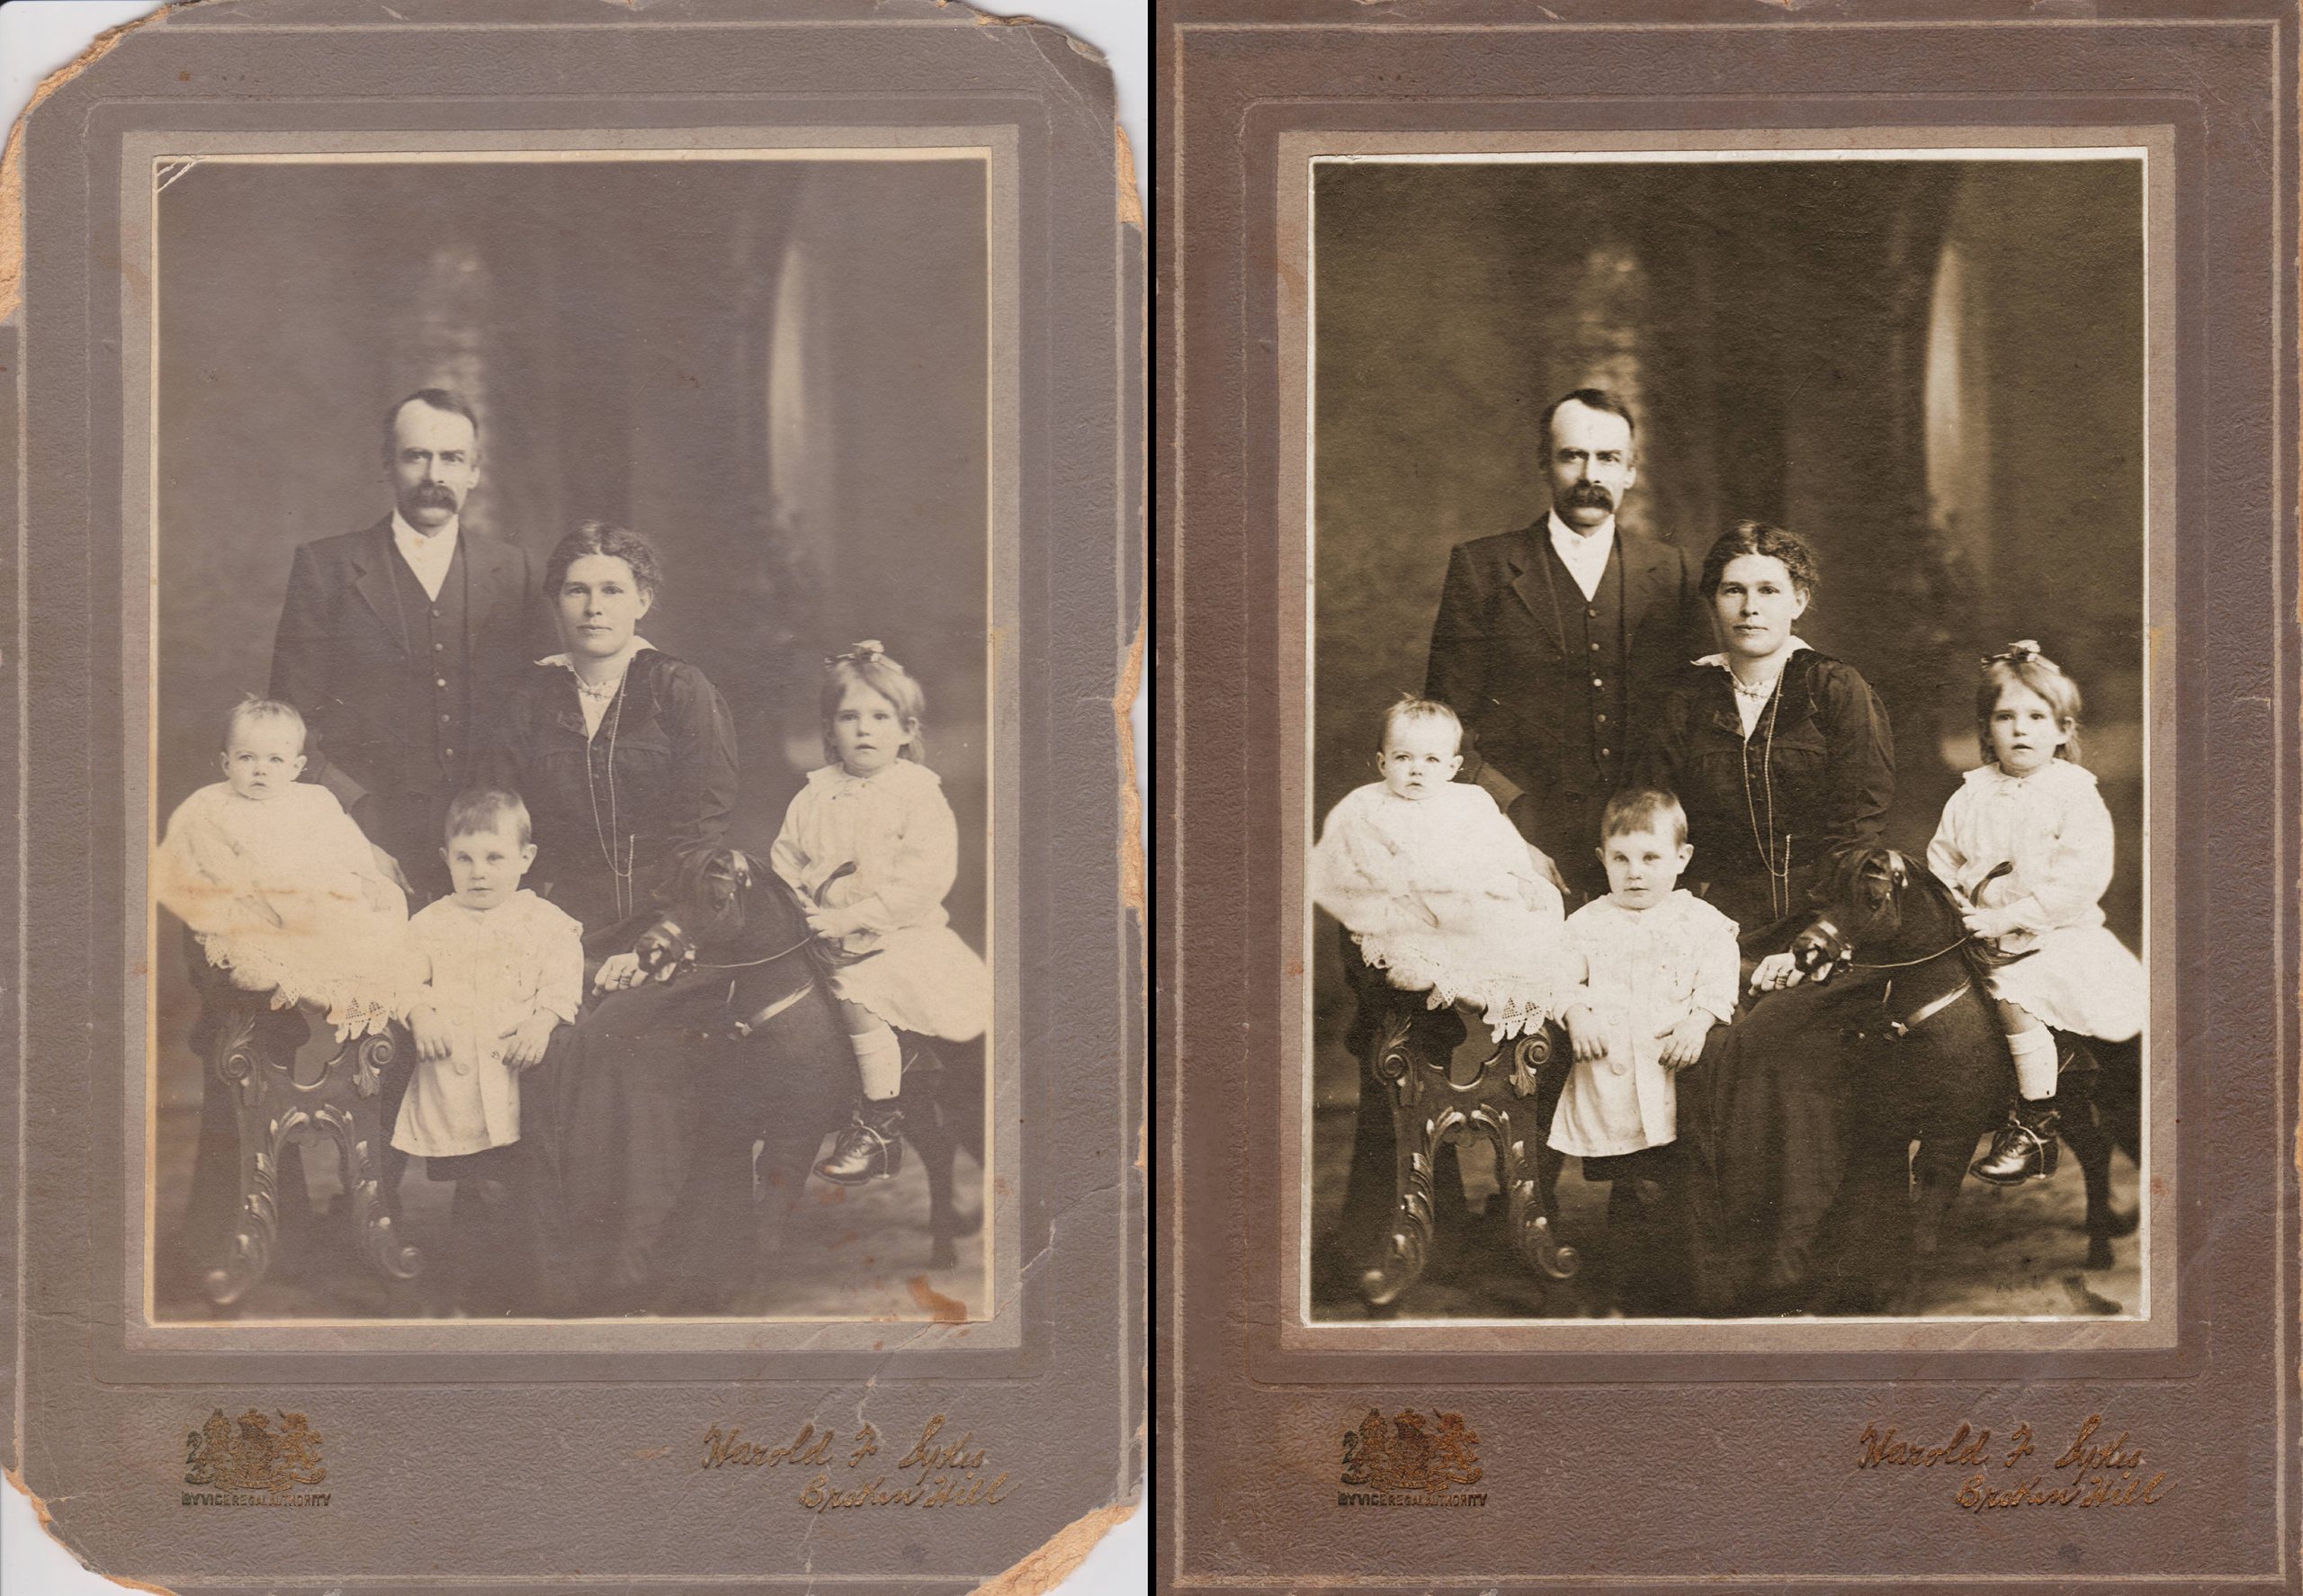
Some examples of restored images:

Dust, scratch and stain removal
Colour balance and contrast enhancement

Dust, scratch and stain removal
Colour balance and contrast enhancement
Writing removal

Dust and scratch removal
Colour balance and contrast enhancement
Hope somebody finds this information helpful.
TL;DR:
- Use a scanner, not a camera
- Scan in lossless format – as high resolution as practical
- Scan photos one at a time
- Use only archival quality storage materials
Leave a Reply